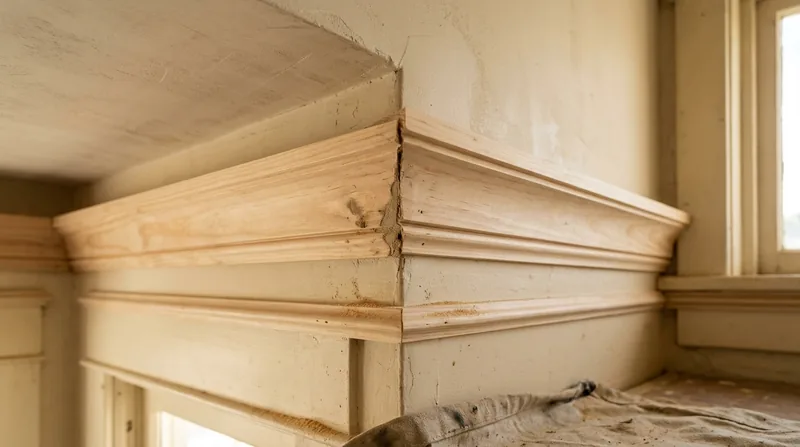




Oceanside's coastal residential stock spans from 1920s beach cottages with tight floor plans to Spanish Colonial Revival bungalows and post-war ranch homes, each with distinct trim profiles and architectural character. Crown molding and baseboard installation in Oceanside requires an understanding of period-appropriate detailing, the marine climate's effect on wood movement, and the skill to execute clean coped joints that hold up against salt air and seasonal humidity swings. Whether you're restoring a Craftsman cottage near the pier, updating a Mission San Luis Rey ranch house, or adding coastal-modern trim to a Morro Hills residence, the difference between competent work and craft-level installation shows immediately in how light plays across a coped joint and how baseboards sit flush against out-of-square walls. We install crown molding, baseboards, and chair rail with the precision and finish that Oceanside's older homes deserve, and we know how to adapt profiles to newer construction without compromising the home's visual integrity. Our approach starts with listening to what you want the room to feel like, then we measure, template, and install trim that sits tight and lasts.
Why Crown Molding and Baseboard Installation Matters in Oceanside's Older Homes
Oceanside's beach cottages, Spanish Revival bungalows, and mid-century Craftsman homes were built with specific trim profiles that define their character and proportions. Crown molding that's too thin, baseboards that don't sit flush to the wall, or joints that open up over time undermine the quality of a room and invite moisture into wall cavities. The marine layer, salt air, and seasonal humidity swings mean that wood trim moves and that caulk lines fail if they're not executed with care and the right materials. Poor installation also creates sight lines that draw the eye to gaps and shadows, making a room feel cheap or neglected even if everything else is finished well.
- Properly installed crown molding and baseboards define room proportion and add visual weight to spaces that need it.
- Tight coped joints and clean caulk lines resist salt air and coastal humidity better than butt joints or loose fits.
- Period-correct profiles on older homes preserve architectural character and protect resale value.
- Baseboards installed flush to the wall prevent dust accumulation and make cleaning easier.
- Quality installation reduces callbacks and callbacks cost money and time you don't have to spend.
Getting crown molding and baseboard installation right the first time adds lasting detail to your home and avoids the expense of rework.
Local example: A 1930s beach cottage in South Oceanside had flat, builder-grade baseboards installed over plaster that had settled unevenly. We removed the old trim, shimmed the walls, and installed new baseboards with a period-correct ogee profile, coped at every corner. The room gained visual depth and the trim now sits flush to the wall, even where the plaster dips. The caulk lines are tight and the finish is consistent throughout.
How We Install Crown Molding and Baseboards in Oceanside: Our Process
We start every trim job with careful measurement and a walk-through of what you want the finished room to feel like. We assess wall condition, identify out-of-square corners, and determine whether existing baseboards need to come out or can stay. We template complex profiles and run a test fit on scrap wood to make sure joints are tight before we cut the real material. We work with the grain, use sharp tools, and take time at every corner to get the coped joint or miter right the first time. Caulking and finishing happen last, and we use paintable caulk that stays flexible in Oceanside's humidity swings.
- We measure every wall and mark corner locations, accounting for out-of-square conditions and wall movement.
- We select or match molding profiles to your home's period or to the aesthetic you're aiming for.
- We cut coped joints at inside corners and tight miters at outside corners, test-fitting before final installation.
- We fasten trim with finish nails or screws, sized and placed to hold without splitting the wood.
- We fill nail holes, caulk gaps, and sand the finish smooth before you paint or stain.
- We clean up debris and leave the room ready for your final finish work.
The result is trim that sits tight, joints that stay closed, and a room that looks finished and intentional.
Oceanside example: A 1970s ranch home in Rancho del Oro had an open-plan kitchen and living room with no trim at all. We installed simple, clean-lined baseboards and a shallow crown molding that echoes the home's horizontal character without overwhelming the space. We coped every corner, set all fasteners, and left the wood unfinished so the homeowner could paint it to match the walls. The trim cost from $1,200 to $1,600 depending on linear footage and took four working days.
Crown Molding and Baseboard Installation Methods: What Works Best
| Method | Description | Best for |
|---|---|---|
| Coped joints | Inside corners are cut to fit the profile of the adjoining piece, leaving a tight, gap-free joint that moves with humidity. | All interior corners on crown molding and baseboards; standard in quality finish work. |
| Miter joints | Outside corners are cut at 45 degrees on both pieces and fitted together; requires tight fit and careful caulking. | Outside corners and where trim changes direction; less forgiving than coped joints in coastal humidity. |
| Direct fastening to studs | Trim is nailed or screwed directly into wall studs for maximum holding power and minimal movement. | Baseboards in older homes where plaster has settled or walls are out of square; provides solid anchorage. |
| Shimmed installation | Shims are placed behind trim to bring it flush to an uneven wall surface before fastening. | Oceanside cottages and older homes where plaster waves; ensures trim sits flat and sight lines are clean. |
| Paintable caulk finish | Gaps between trim and wall or at joints are filled with flexible, paintable caulk that accommodates wood movement. | Coastal homes where humidity and salt air cause seasonal movement; holds better than rigid filler in Oceanside's climate. |
Crown Molding and Baseboard Installation Cost in Oceanside: What to Expect
Crown molding and baseboard installation in Oceanside typically starts at $450 for a small room or single wall, but the real cost depends on linear footage, profile complexity, corner count, and wall condition. A full-room installation with coped joints, shimming, and finish work usually runs $1,200 to $2,500 depending on the size of the space and the profile you choose. If walls are significantly out of square or plaster is damaged, shimming and wall prep add time and cost. Simple, modern profiles cost less than period-correct ogee or crown molding that requires more careful joinery. Getting 2 or 3 estimates from local carpenters helps you understand what's typical for your specific job and what's included at each price point.
We offer full pricing details and examples on our pricing page, and we provide a free estimate at (760) 512-8298 with no obligation. We measure the job carefully and explain what drives the cost so you know exactly what you're paying for.
What to Look for When Hiring a Carpentry Contractor Near Oceanside for Trim Work
Hiring a carpenter for crown molding and baseboard installation is an investment in your home's finish and character, so it's worth taking time to find someone who understands your home's style and can execute clean joints. Look for a contractor who is fully insured, can show you examples of past trim work, and will give you a written estimate that spells out materials, labor, and timeline. Ask whether they handle wall prep, caulking, and finishing, or if those are separate. Check references from recent jobs and ask specifically about how joints held up and whether callbacks were needed. If your home is older or in a historic area, ask about any local guidelines or HOA requirements for exterior trim or visible changes. A good estimate should feel thorough, not rushed, and should include a site visit where the contractor measures carefully and discusses your preferences.
- Verify that the contractor is fully insured and can provide a certificate of insurance before work begins.
- Ask for references from three recent trim jobs and call them to ask about joint quality and durability.
- Get a written estimate that lists materials, labor, timeline, and what happens if walls need prep or shimming.
- Confirm whether caulking, sanding, and finish prep are included or charged separately.
- Discuss your home's age and architectural style so the contractor can recommend profiles that match your home's character.
Taking time to hire the right carpenter means your trim will look finished for years and you won't pay for rework. Call us for a free estimate and we'll walk you through the whole process.
Crown Molding & Baseboard Installation in Oceanside: Pricing Guide
| Service | Price | Details |
|---|---|---|
| Small room or single wall baseboard | Starting at $450 | Linear feet under 80, straight runs, minimal prep, includes fastening and caulk fill |
| Full room crown molding and baseboards | $1,200 to $2,500 | Typical 12x14 room with coped joints, shimming on uneven walls, finish prep included |
| Complex profile or high wall crown | $2,500 to $4,000+ | Ornate period-correct molding, vaulted ceilings, multiple rooms, extensive wall prep or plaster repair |
| Wall prep and shimming | Included or $150 to $400 | Depends on extent of uneven plaster or drywall; assessed during site visit before final estimate |
| Travel and estimate | Free estimate, included travel | No mileage fee or call charge in Oceanside and surrounding service areas; response within 24 hours |
Indicative pricing, the exact cost depends on square footage, finish, and site access. Free personalized estimate within 24h at (760) 512-8298.


